
The Easy Way to Fix Samsung Galaxy S8 Cracked Edge Screen

Forward Lab
June 21, 2022
Difficulty
★☆☆ Low
Step
5
Required Time
15 minutes
Excerpt
Do you trap in the troubles that you have no idea to laminate the cracked EDGE screen of S8 successfully this time? Do not know what’s the problem during the process of refurbishment? Today we would like to show you how to laminate the EDGE screen easy and fast.
Accessories
special molds for S8, a silicone mat, the dustless clothe, white oil, a new OCA, a new glass, the RMB-2 laminating machine and the mobile panel
Have you ever received many repair orders to refurbish the edge screens of Samsung Galaxy S8, but you did not know how to fix it well in accordance with the ways you knew? And the final repaired effect didn’t achieve your expectation, so you had to explain the reasons to your customers. It greatly reduced your work efficiency.
You don’t need to worry about it anymore. Today, we Forward would like to share with you that how to laminate Samsung Galaxy S8 edge screen easily. You just need to follow our repair instructions below. We think that it can help you improve your cellphone repair skills after you follow our steps to refurbish the edge screens with Samsung Galaxy S8.
Now, let’s begin.
Prepare Jobs
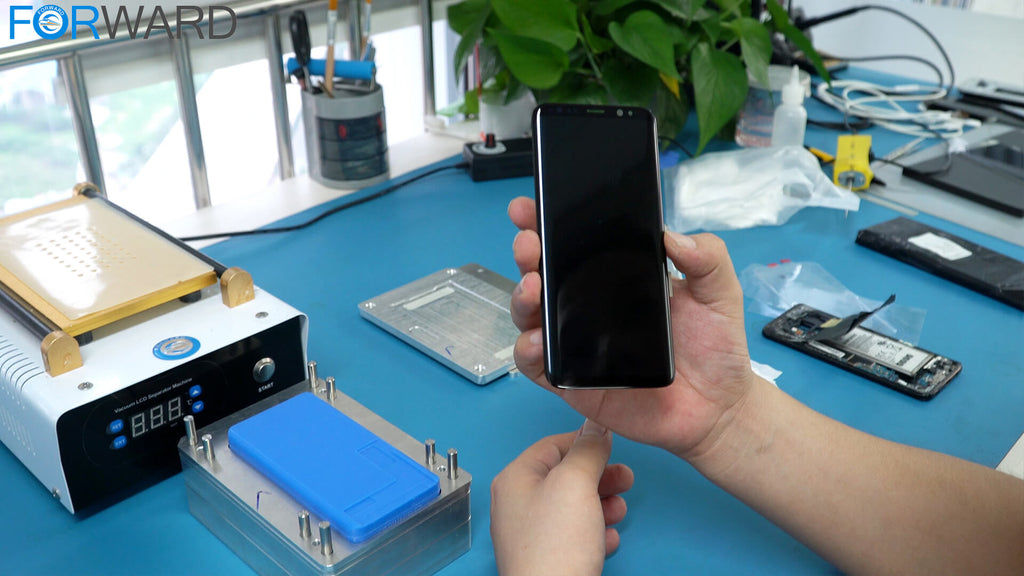
In this case, we should prepare the tools, such as the special molds for S8, a silicone mat, the dustless clothe, white oil, a new OCA, a new glass, the RMB-2 laminating machine and the mobile panel.
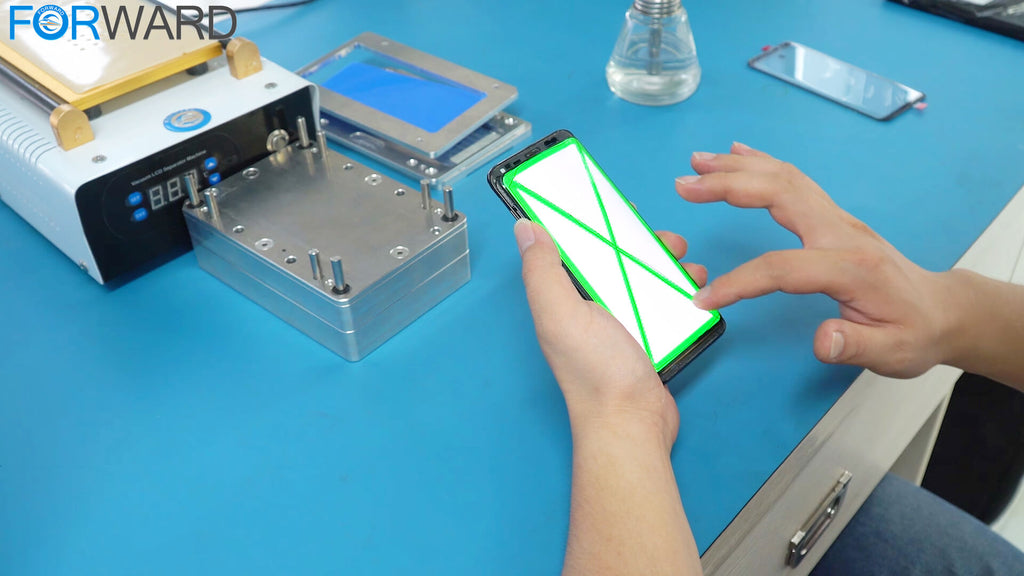
Cracked Screen Testing
We should test the display, the touch of the screen and make sure they both still work well.
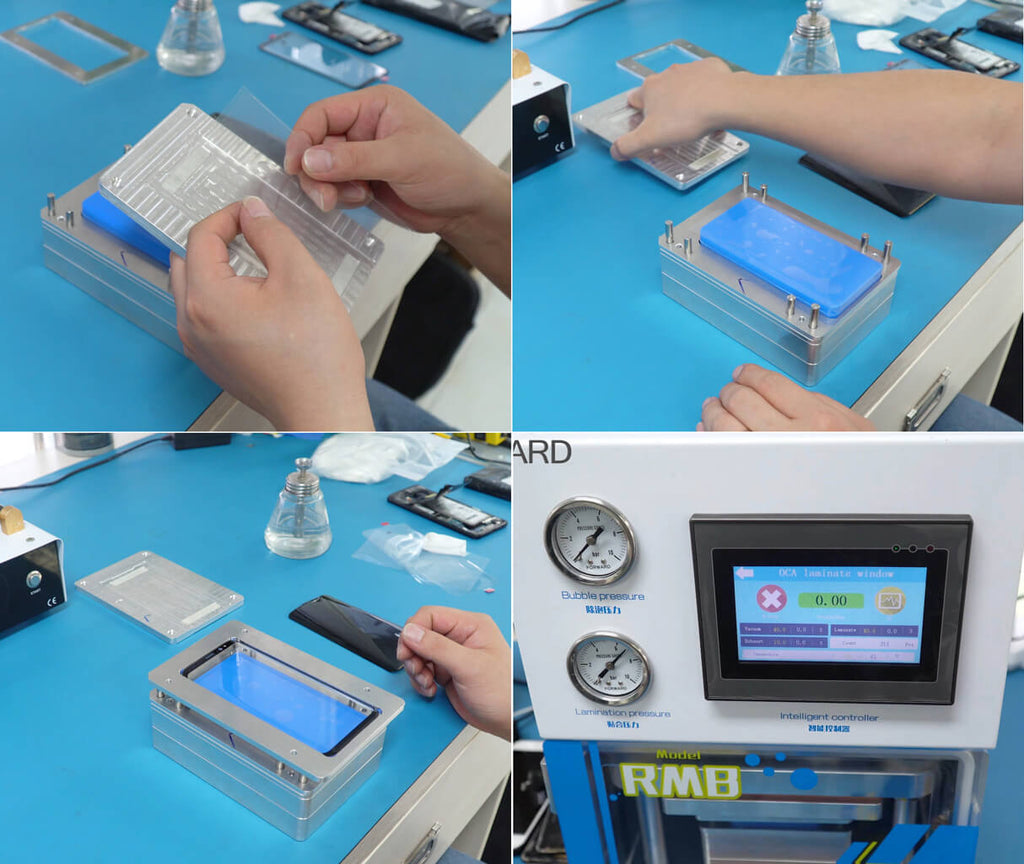
OCA Laminating
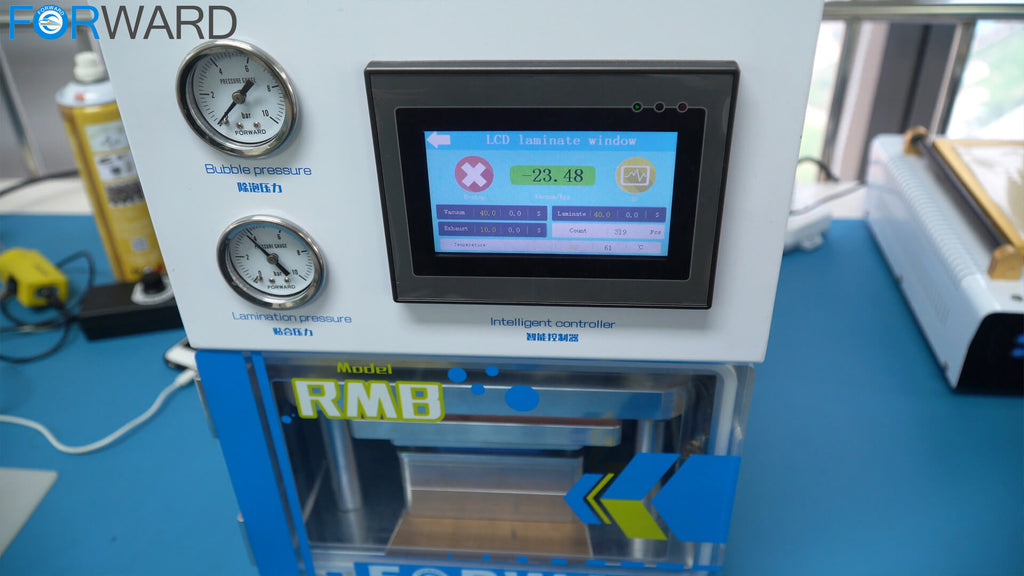
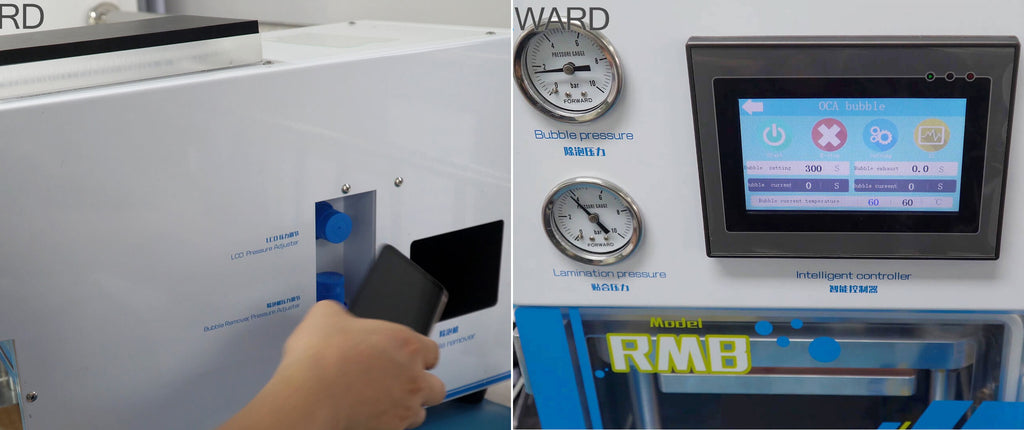
For the OCA lamination, we need to stick a new piece of the OCA to the new glass by using the special molds for S8 and RMB-2 laminating machine. We should select the mode of OCA laminating in this process. Besides, we need to set up the time of vacuuming to 40s and the laminating time to 40s.
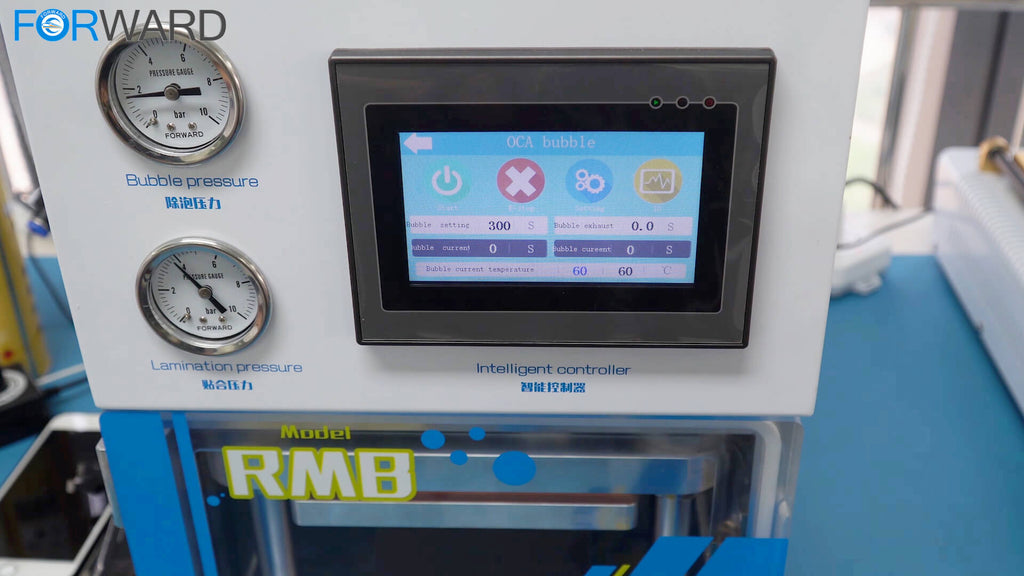
After the lamination, we would check if there is any bubble on the affixed glass with the OCA or not? If we see the bubbles on the glass obviously, we should put it into the bubble remover to remove bubbles. At this time, we need to select the mode of OCA bubble and set the bubble exhaust time to 180s. Once done, we can see that the glass looks perfect without any bubble.
Warm tips: The key part in this process is to align the position of the molds, so you must make sure all the molds have been calibrated before you put the molds into the RMB-2 machine. Moreover, the smooth side of the silicone mat should face up on the molds.
LCD Laminating
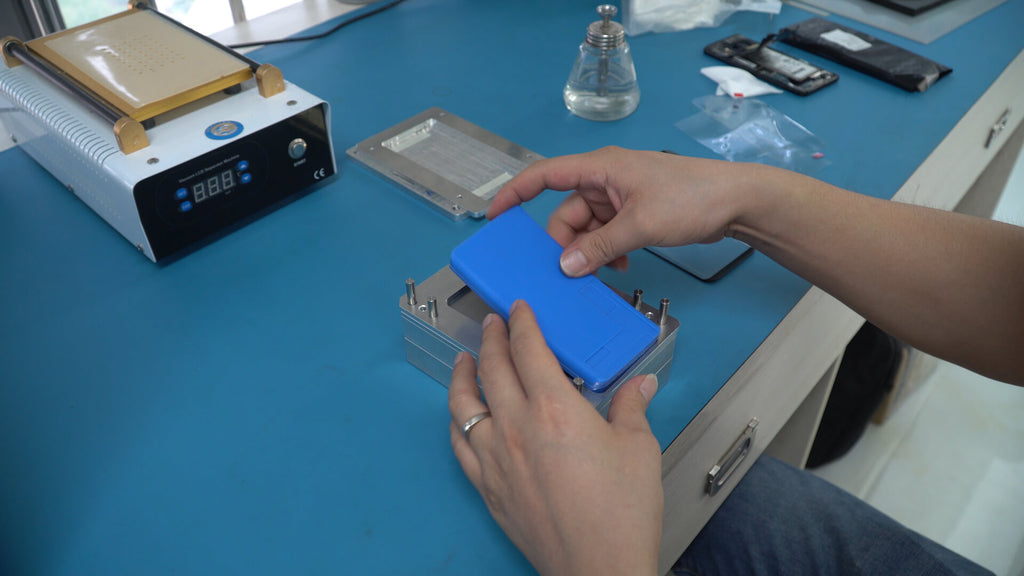
The OCA lamination is finished; the next step is to bond the glass to the LCD. This step is similar to the OCA lamination. But in this step, we have to turn over the silicone mat, let the flex cable side face up on the mold and make sure the flex cable with the screen is outside the molds. Besides, we have to locate the positions with the molds and the position of the LCD and the glass.
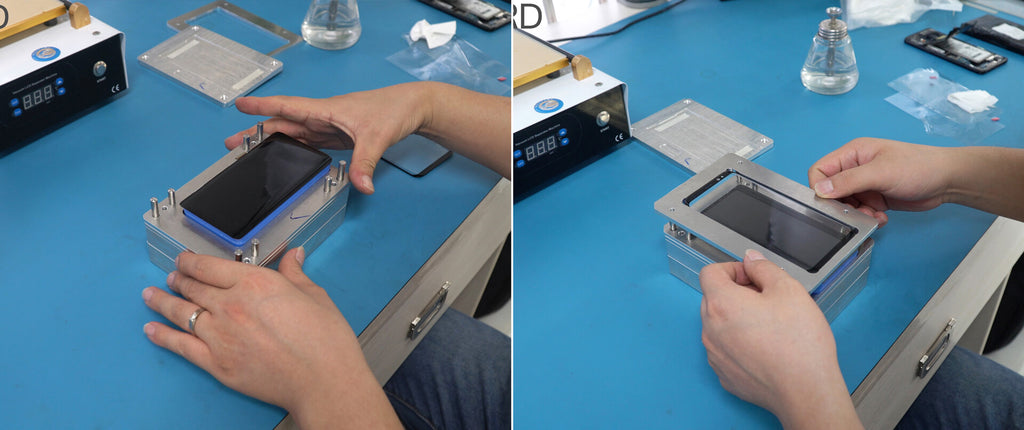
After the alignment, we put the molds into the RMB-2 machine and select the mode of LCD laminating. The time of vacuum should be set to 40s and the lamination time to 40s.
Then, we need to look for the bubbles and put it into the bubble remover if it has bubbles on the screen. The bubble exhaust time is 300s.
Here we can see the screen looks perfect without any bubbles, so the LCD lamination job is finished well.

Repaired Screen Testing
Once we finish all the above steps, we need to test the display and the touch work nor not.
The job is well done when your confirmation.
That is it. Hahaha… Do you think this repair way of S8 is easy and useful for you? The main machine we should use here is RMB-2 laminating machine. This is a practical and economical laminating machine, and it has the function of bubble remove.
Please feel free to contact us directly if you want to need more information or details.
Thanks.